Debian USB installer
A complete guide to turning any x86 PC into a DisplayFlow digital signage player. Our bootable Linux installer does everything automatically — you just download, flash and boot. It takes about 15 minutes, including download time.
What you need
- Any x86-64 PC from the last 10 years
- At least 4 GB RAM, 8 GB recommended
- At least 16 GB storage
- HDMI or DisplayPort output
- Ethernet or Wi-Fi
- A USB stick of 4 GB or more
The installer is based on Debian 13 and should work on any PC made since around 2014. We regularly test on second-hand Dell OptiPlex and Lenovo ThinkCentre machines because they are cheap, reliable and common on the second-hand market.
Step 1
Download the installer
The installer is a bootable Linux image with the DisplayFlow player pre-installed. Download it, flash it to a USB stick and boot your target computer from it.
Download DisplayFlow Kiosk Installer
- File
- displayflow-kiosk-debian13.iso
- File size
- 1.4 GB (1,404,108,800 bytes)
- SHA-256
ffe13948b892d47f0ec631814d03686dd41e3edd40e41715eff52d83d0090634
Download time depends on your internet connection.
Step 2
Flash the USB stick
Flashing means writing the ISO image to the USB stick so that it becomes bootable. This erases everything on the USB stick — back up any files you want to keep first.
Recommended tool: Rufus (free, open source)
- 1 Download Rufus from rufus.ie
- 2 Insert your USB stick
- 3 Open Rufus and select your USB stick under "Device"
- 4 Click "SELECT" and browse to the downloaded displayflow-kiosk-debian13.iso
- 5 Leave all other settings at their defaults
- 6 Click "START" and wait until it finishes (about 3 minutes)
- 7 When Rufus shows "READY", you can safely remove the USB stick
Step 3
Boot from USB
When you switch on the computer, it normally starts from its internal drive. To boot from your USB stick, you need to open the boot menu. The key varies between manufacturers.
| Manufacturer | Boot menu key |
|---|---|
| Dell | F12 |
| HP | F9 |
| Lenovo | F12 (sometimes Fn+F12) |
| ASUS | F8 |
| Acer | F12 |
| MSI | F11 |
| Intel NUC | F10 |
| Others | Esc, F2, F10 or F12 — try each one |
- 1 Insert the USB stick into the computer
- 2 Switch on the computer and immediately press the boot menu key repeatedly
- 3 Select your USB stick in the boot menu (often shown as "UEFI: [USB brand]" or similar)
- 4 DisplayFlow Kiosk Installer should now appear
If you get a "Secure Boot" error, go into the BIOS settings and either disable Secure Boot or enable "Other OS" boot mode. This is harmless for a dedicated digital signage player.
Step 4
Wait for the installation
The installation is fully automated. Once booted, it installs Debian, configures the player and restarts itself. It takes about 10 minutes.
Leave the computer alone during the installation. Do not interrupt it, and do not remove the USB stick until it has restarted.
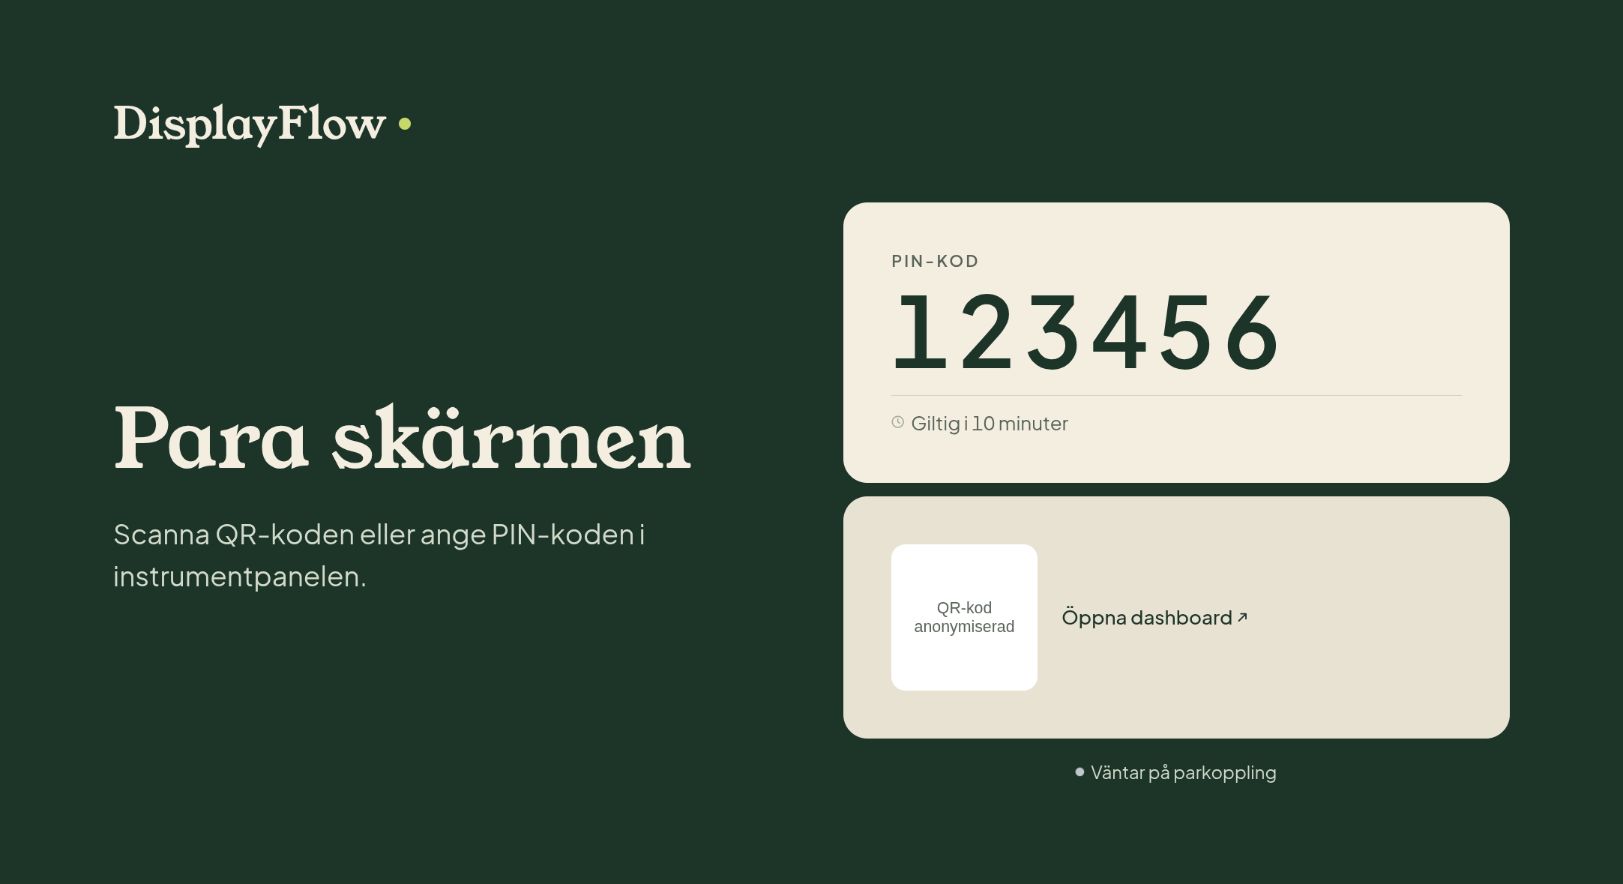
After the restart, the screen shows the DisplayFlow logo, a large 6-digit pairing code and instructions to enter the code at https://displayflow.app/app/welcome/pair.
Step 5
Pair your screen
With the pairing code visible on your screen, go to your DisplayFlow dashboard. If you have not created an account yet, start your free trial here.
- 1 Sign in to your DisplayFlow account
- 2 If this is your first screen, the welcome flow guides you through pairing
- 3 If you have paired screens before, go to Screens → Add screen
- 4 Enter the 6-digit code and give the screen a descriptive name
- 5 Click "Pair this screen"
Within a few seconds the pairing screen disappears and the screen is ready for content.
Common problems
Frequently asked questions
Ready to get started?
90 days free. No credit card, no sales call.