Install guide
Installing the DisplayFlow player
A complete guide to turning any x86 PC into a DisplayFlow signage player. Takes about 15 minutes including download time.
What you need
- Any x86-64 PC from the last 10 years
- 4 GB RAM minimum, 8 GB recommended
- 16 GB storage minimum
- HDMI or DisplayPort output
- Ethernet or Wi-Fi capability
- A 4 GB or larger USB stick
The installer is based on Debian 13 and should work on any PC manufactured since ~2014. We regularly test on refurbished Dell OptiPlex and Lenovo ThinkCentre hardware because they're cheap, reliable, and plentiful on the second-hand market.
Step 1
Download the installer
The installer is a bootable Linux image with the DisplayFlow player pre-installed. Download it, flash it to a USB stick, and boot your target PC from it.
Download DisplayFlow Kiosk Installer
webtv-kiosk-debian13.iso · ~950 MB · SHA256: [placeholder]
Download ISOThe download is about 950 MB. On a typical broadband connection this takes 2-5 minutes.
Step 2
Flash the USB stick
Flashing means writing the ISO image to the USB stick so it becomes bootable. This erases everything on the USB stick — back up anything you want to keep first.
Recommended tool: Rufus (free, open source)
- 1 Download Rufus from rufus.ie
- 2 Insert your USB stick
- 3 Open Rufus and select your USB stick under "Device"
- 4 Click "Select" and choose the downloaded webtv-kiosk-debian13.iso
- 5 Leave all other settings at default
- 6 Click "Start" and wait for it to finish (about 3 minutes)
- 7 When Rufus says "Ready", you can safely remove the USB stick
Step 3
Boot from USB
When you turn on the PC, it normally boots from its internal drive. To boot from your new USB stick, you need to access the boot menu. The key varies by manufacturer.
| Manufacturer | Boot menu key |
|---|---|
| Dell | F12 |
| HP | F9 |
| Lenovo | F12 (sometimes Fn+F12) |
| ASUS | F8 |
| Acer | F12 |
| MSI | F11 |
| Intel NUC | F10 |
| Generic | Esc, F2, F10, or F12 — try each |
- 1 Insert the USB stick into the PC
- 2 Turn on the PC and immediately start tapping the boot menu key
- 3 From the boot menu, select your USB stick (often shown as "UEFI: [USB brand]" or similar)
- 4 The DisplayFlow Kiosk Installer should appear
If you see a "Secure Boot" error, enter BIOS setup and either disable Secure Boot or enable "Other OS" boot mode. This is safe for a dedicated signage player.
Step 4
Wait for installation
The installer is fully automated. Once it boots, it will install Debian, configure the player, and reboot itself. This takes about 10 minutes.
Leave the PC alone during installation. Don't interrupt it, don't remove the USB stick until it reboots.
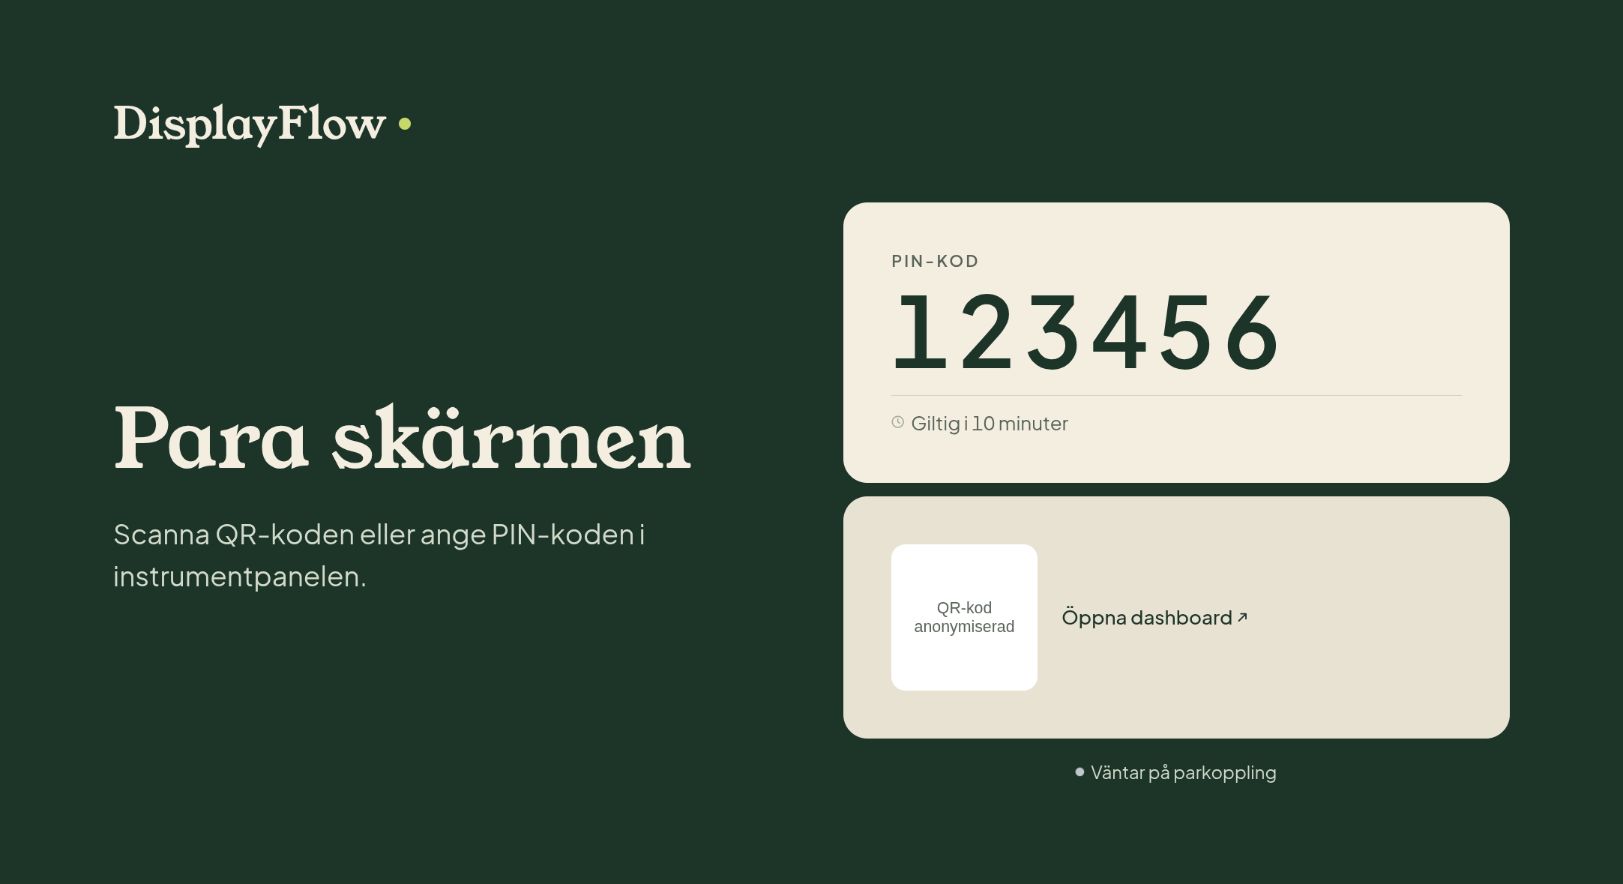
After reboot, the screen will show the DisplayFlow logo, a large 6-digit pairing code, and instructions to enter the code at https://displayflow.app/app/welcome/pair.
Step 5
Pair your screen
With the pairing code visible on your screen, go to your DisplayFlow dashboard. If you haven't created an account yet, start your free trial here.
- 1 Sign in to your DisplayFlow account
- 2 If this is your first screen, the welcome flow will guide you through pairing
- 3 If you've paired screens before, go to Screens → Add new screen
- 4 Enter the 6-digit code and give your screen a descriptive name
- 5 Click "Pair this screen"
Within a few seconds, the pairing screen on your display will disappear and the screen will be ready for content.
Troubleshooting
FAQ
Still need help?
Our support team has installed DisplayFlow on hundreds of machines. We've probably seen your problem before.